

Several months ago I wrote a very detailed post on how I’ve been updating firmware for my Lumix cameras and lenses. It’s been quite popular. I was going to take it down and replace it with this new updated information but I’ve decided to just add this to the top of the original post so comments can be retained. The new information below is based on support from Robert Kozlarek of Panasonic US. The US Panasonic web site seems to have a much simpler way and instructions for updating firmware. So here is the current information.
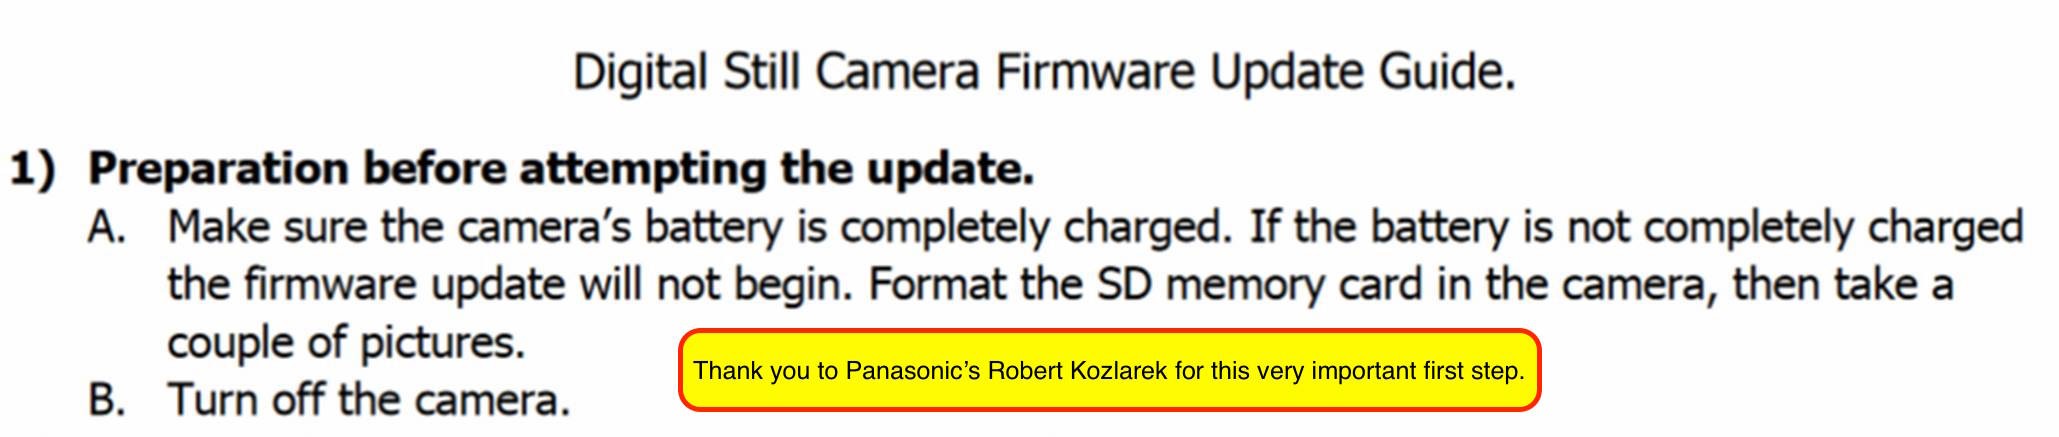
1) Preparation before attempting the update.
A. Make sure the camera’s battery is completely charged. If the battery is not completely charged
the firmware update will not begin. Format the SD memory card in the camera, then take a
couple of pictures.
B. Turn off the camera.
2) Copying the Firmware to your memory card.
A. Download the latest firmware update for your model by clicking on the “Download Ver. X.X ” link
to a location on your computer (we recommend the “Desktop”).
B. If your computer has a media reader, please insert your formatted SD Card from your camera.
C. Open the zipped firmware file that you downloaded to the desktop.
D. For “PC” users, locate your SD Card by clicking on, or opening the “My Computer” or
“Computer” on your desktop or your “Start” menu.
For “Mac” users, can use “Finder” if the drive does not mount to your desktop.
E. “Drag” to Copy and Paste” the .bin file from the opened folder to the drive with the SD Card
showing in your “My Computer” window for “PC” users and “Finder” or “Drive” in Macs. This will
copy the file to the card.
F. If you choose to leave the SD Card in your camera, connect the camera to the PC with the USB
cable. Turn the camera on and set it to “Playback” mode. Then select “PC” on the LCD screen.
Drag the .bin file from the opened folder to the device that either says Panasonic or mass storage
to complete the transfer.
G. “SDXC cards, 32GB or larger, require special card readers. Depending on your PC, and the age of its operating system, you may not be able to directly write to such large cards. If your PC asks
you to format the card, DO NOT, this is one indication that your system is not compatible with
the newer larger memory cards. In this case a smaller card, 16GB or smaller should be used
3) Updating the Camera’s firmware.
A. Turn the Camera off, insert the SD Card if you copied the firmware to the card while inserted into
the computer.
B. Turn the Camera power on and press the “Playback” button. The Camera’s LCD screen should
now be showing a screen asking if you desire to “Update” the firmware. Highlight “Yes” and
press the “Menu/Set” button.
C. When the Camera has completed the firmware update it will turn itself off and then back on.
D. This completes the update process.
4) Confirming the update.
A. Turn the Camera’s power back on.
B. Set to “Playback” Mode.
C. Choose the “Setup” menu.
D. Select Version Disp.
Original Post Below. You should first try the newest information above but if you run into problems the additional info below may be helpful.
Update Firmware on Panasonic Lumix Cameras & Lenses
This Blog post was inspired by a recent email I received that I’m sharing below. Had this been the only email I’ve ever received on the pain Lumix users feel when firmware updates are released, I wouldn’t even be writing this post. But the email below is pretty typical of many folks I’ve heard from.
Hello, Dan
This past week I traded my Canon for a GH4, and I’m slowly becoming familiar with the m43 format. The body I received has Firmware 1.1; I know Panasonic has and continues to update this, but I am completely lost as to how to do this, and where to find that information in a clear and concise example (I need illustrations!). Their Web site wasn’t much help. Can you point me in the proper direction?
I should tell you, your work and explanations of the Panasonic cameras helped nudge me away from full frame (after 45 years); it was time for something new (video) while continuing to enjoy stills. I can already see the GH4 will meet my expectations, as it has yours. Thanks for sharing that part of your life.
Best, Bill
I want to remind all readers that Panasonic should be commended for offering updates to features they could easily save for future models but are offering as free updates. That’s a huge, huge bonus. But the pain in getting those new features installed needs to be cut to a minimum, or ideally eliminated completely.
Like Bill, who wrote the email I shared above, I also have spent many frustrating hours trying to understand how the Lumix update system works. The current update process is not easy, and I’ve explained this to the Panasonic folks more than once. I’m hoping by bringing this to our readers, and by getting more input we can hopefully convince them they desperately need to update the ease of use on their firmware website.
The following are step by step instructions on how the update process works with screenshots of what you will see during the process. So let’s get started. First do the following.
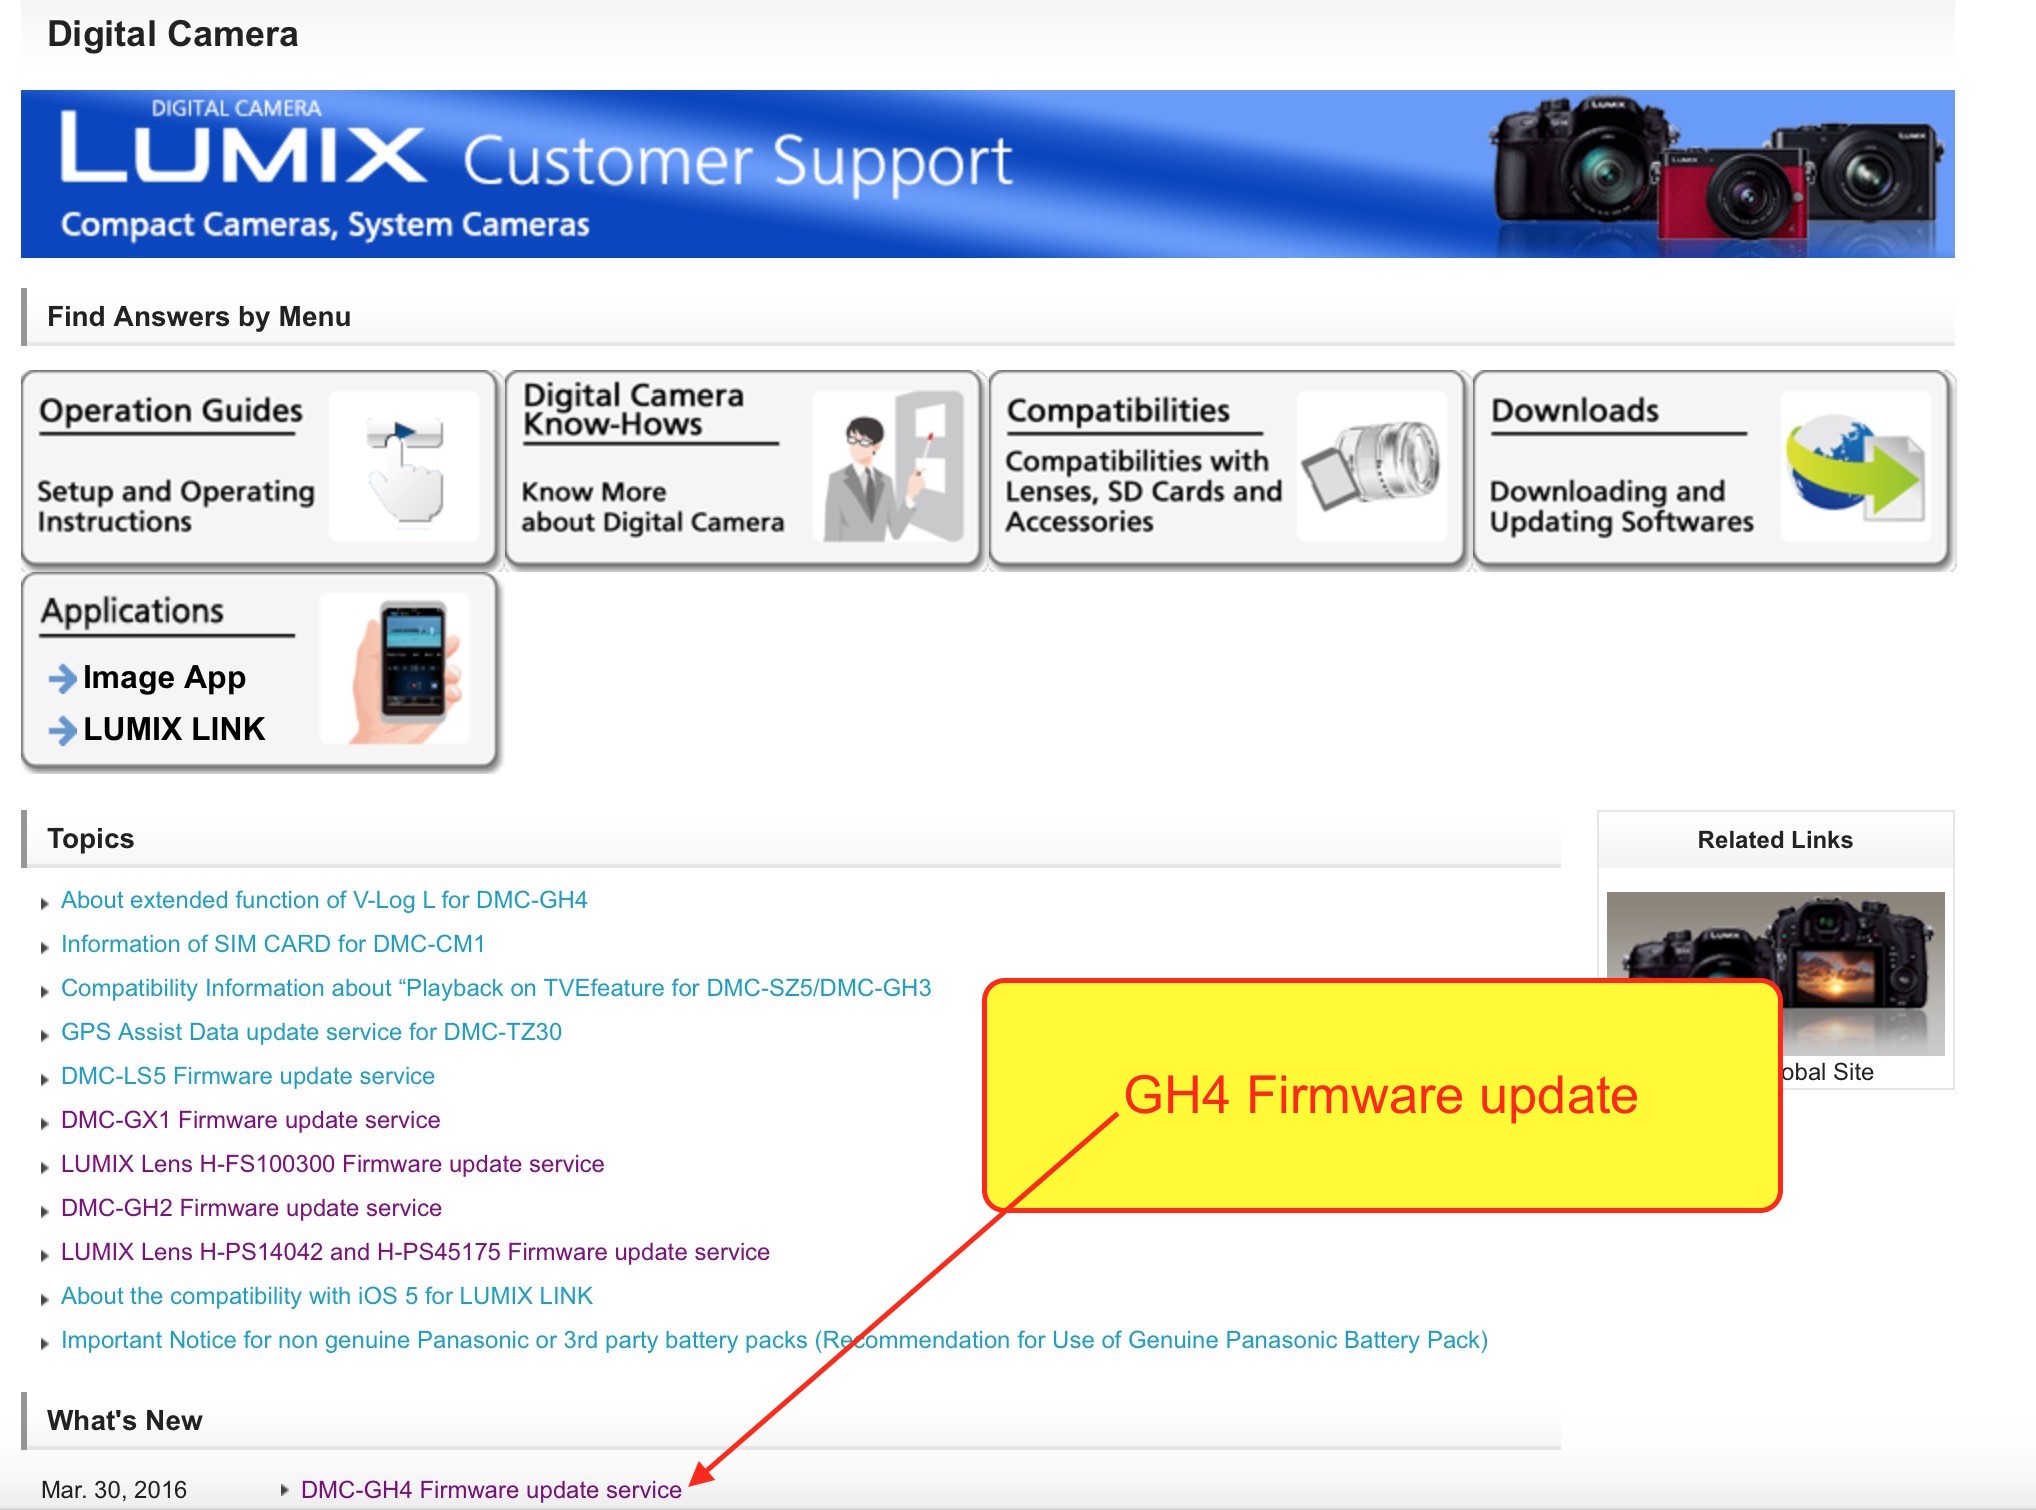
Secondly, you need to get to the Main Support Page to start all camera and lens firmware updates. I’m going to use the newest firmware update for the GH4 as the example for this exercise. If you scroll down from the top you will see a heading tab What’s New. Screenshot below showing the page.
Click on this link. This takes you to the next page which is completely confusing since it has virtually every other camera and lens but the GH4. To get to the GH4, you have to first scroll all the way down to the bottom of this web page. There you will see the title License Agreement. Below that is the option to select either Accepted or Not Accepted. Choose Accepted. You now are taken to a page that actually does list and has the firmware updates for the GH4. Screenshot below.
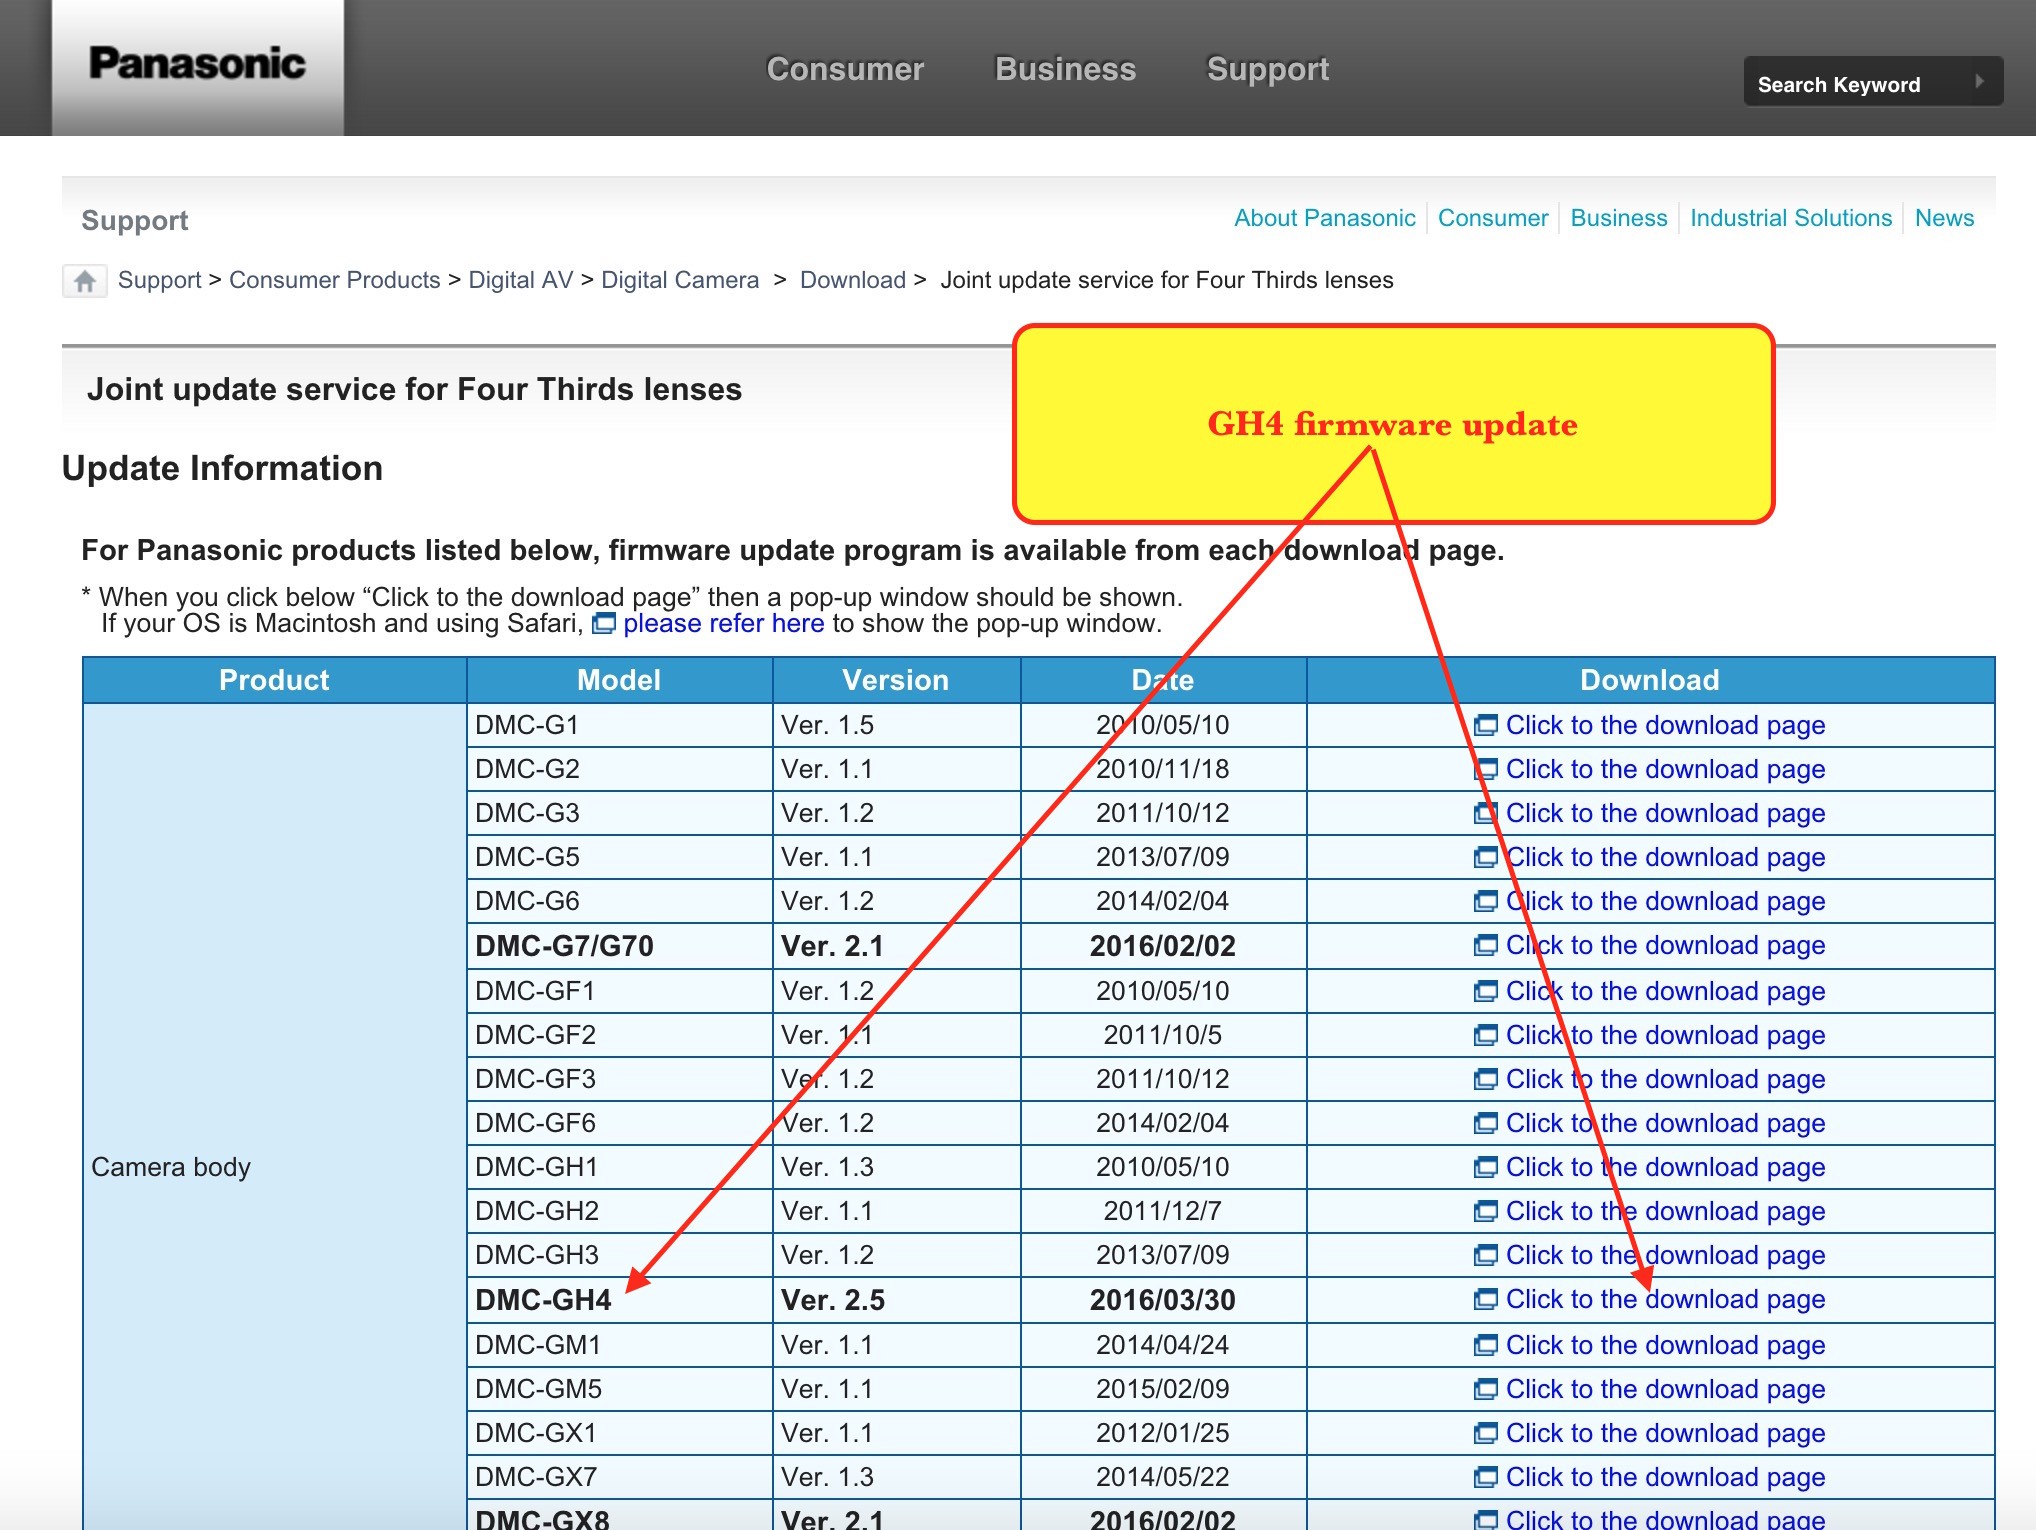
Next, click on the Download Link for the GH4 in the far right column which takes you to the next page. The top of that page shown in screenshot below.
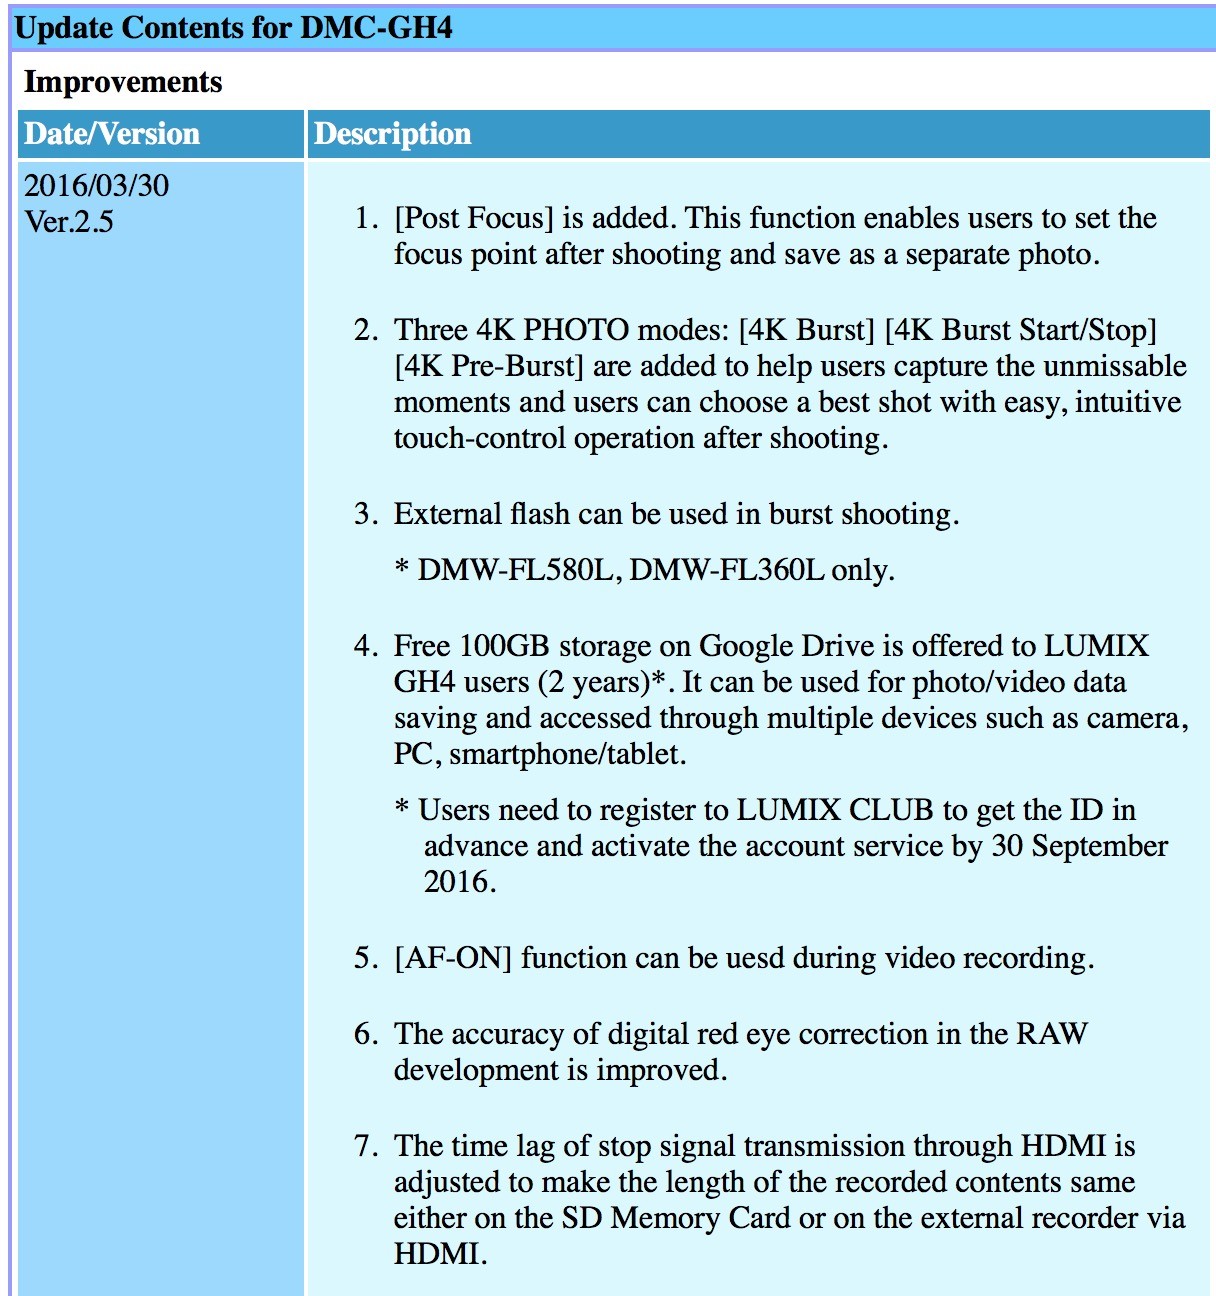
As I mention above, this is just a screenshot of the TOP of the page you need. This page is confusing since it shows not only the newest GH4 update but it also shows a list of all prior updates. Even though the update you are after is described at the top of this page, you actually have to scroll all the way down to the bottom of this same page to see the Download option you’re after. It’s listed as the GH4_V25.bin and has a Download Button for both Mac and Windows. Click on either Mac or Windows, depending on the computer you’re using and the download will begin. On the Mac, the Download is saved to your Downloads folder or wherever you have asked your Internet browser to save them. Mine is the Downloads folder. I believe you can do the same on Windows, but that’s something you will have to figure out yourself since I haven’t used Windows since switching to Mac in 2004.
Once you have downloaded this file you have to GO BACK to the page you chose the GH4 from. Screenshot below and link here.
Scroll about half way down this same page to begin seeing directions for both Windows and Mac. These directions talk about downloading the file to the proper place and making sure it downloads correctly.
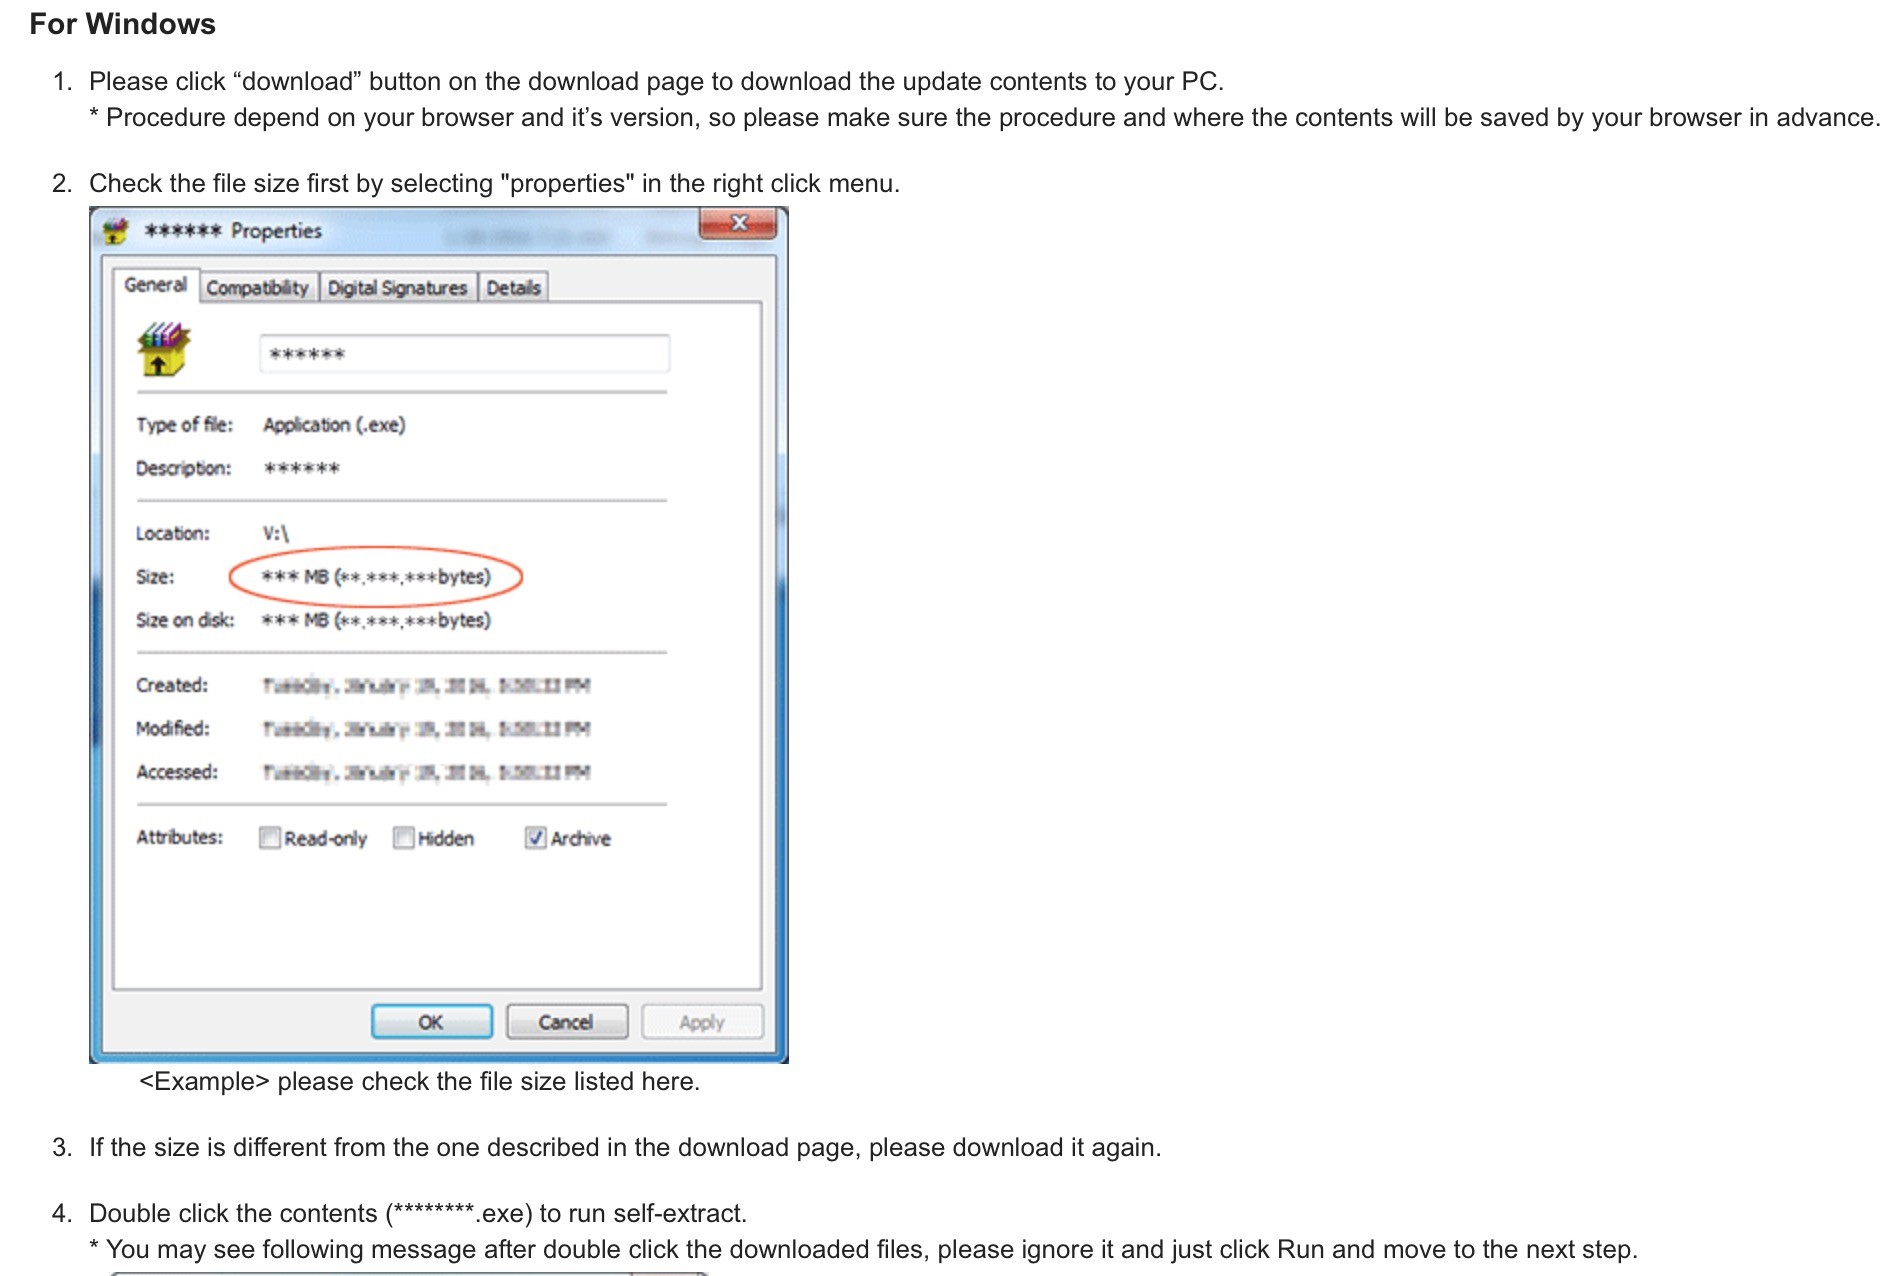
The above screenshot shows the beginning of the instructions for the Windows update process. Keep in mind, the screenshot above is just a portion of the instructions since I can’t fit all of them in a screenshot sample. DO NOT just follow these screenshots—they don’t have all of the info you need. You need to go to the web pages I’ve provided links to for all the details.
Here’s a screenshot of the start of the Mac update process. It tells you to Download but we’re already past this part.
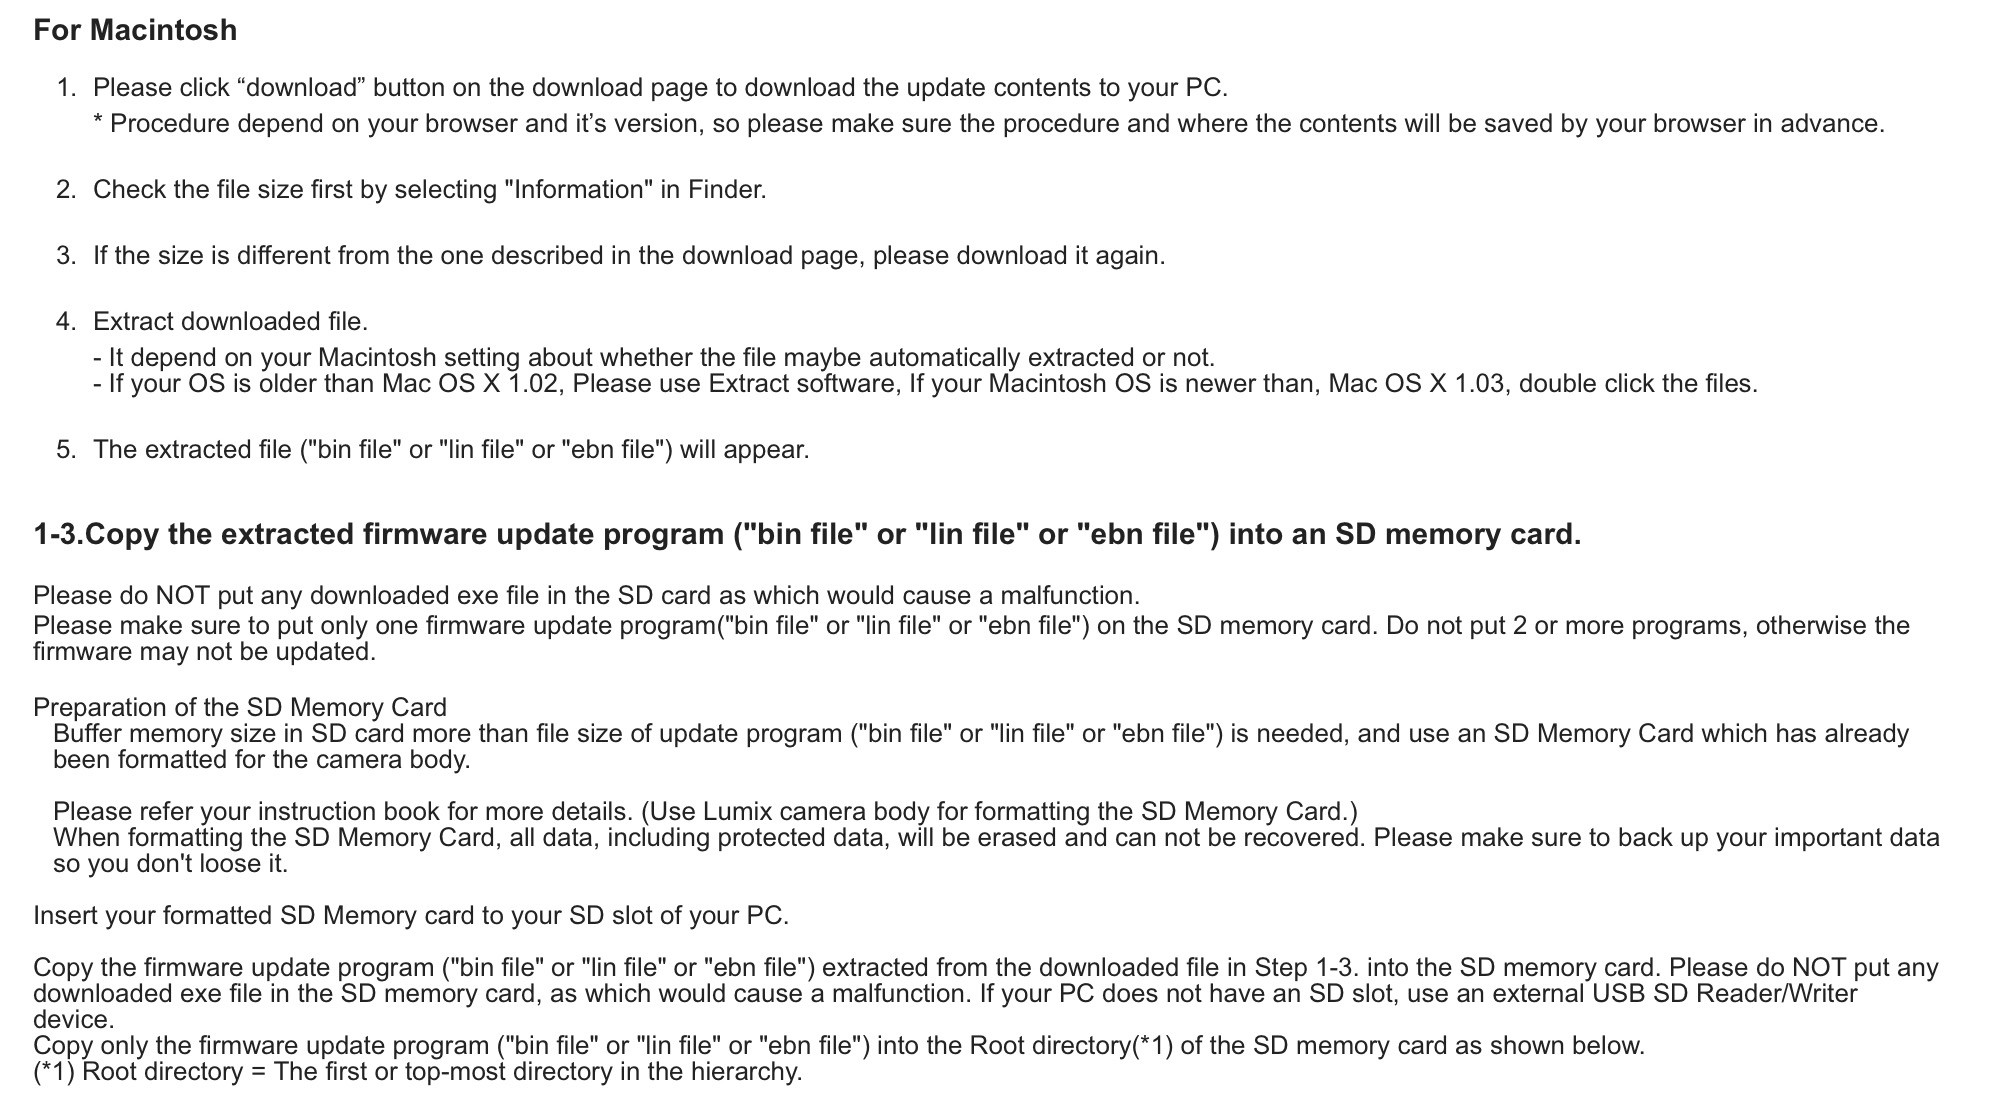
So the above explains how you get the file to your computer and in a place you know where to find it, preferably the Downloads folder. Next we have to get this file onto an SD card to load to your camera. Putting this on an SD card is actually a superior procedure to a direct download to the camera from the Internet, which is the way Olympus does it. If you want horror stories about Olympus camera firmware updates which are caused by a direct download from a web page directly to camera, take a look at this thread on DPReview. The SD card is the way to go even though this whole process is painful.
To prepare the SD card for this file, I always Format the SD card in the camera prior to loading the new update to the card. So Format your card first. Next, make certain the .bin file on your computer, the one that showed up after unzipping the compressed/zip file, is the same size as it shows on the Downlaod page.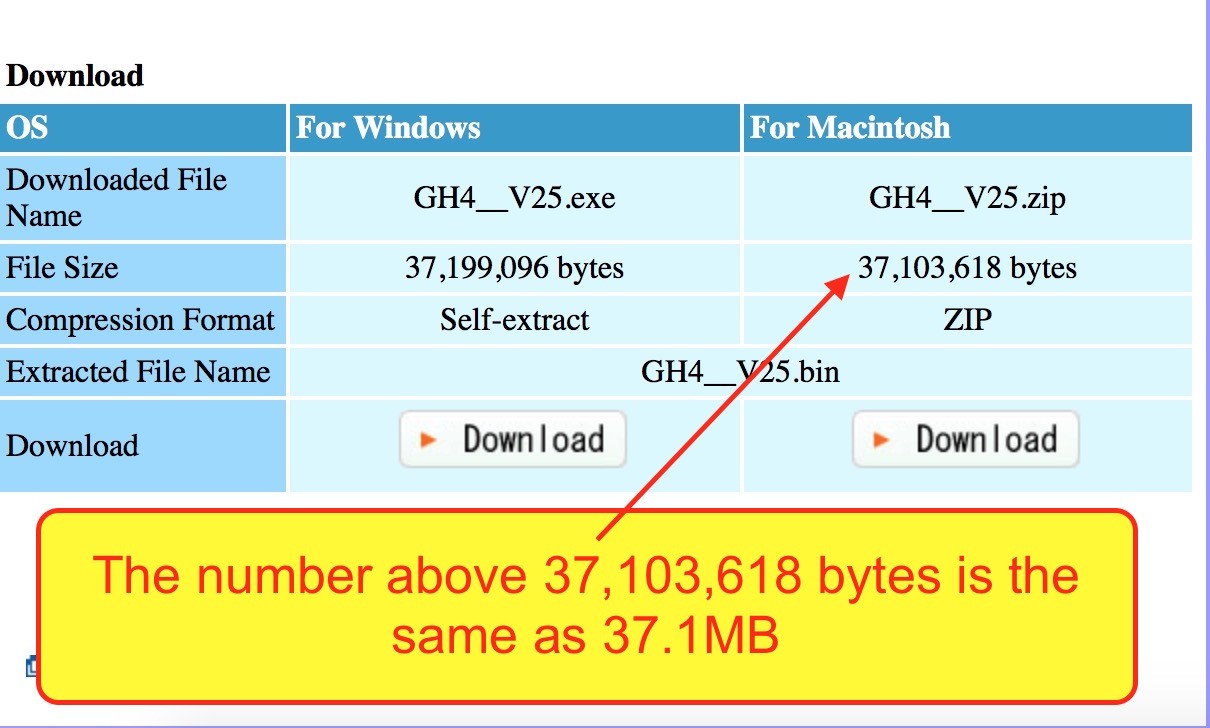
Lumix stresses comparing the size of the files since it’s important to make sure the file was properly downloaded. If the file sizes are different, you don’t have a complete download and this could be a problem. Screenshot below of my computers finder showing the files are the same as the file above.
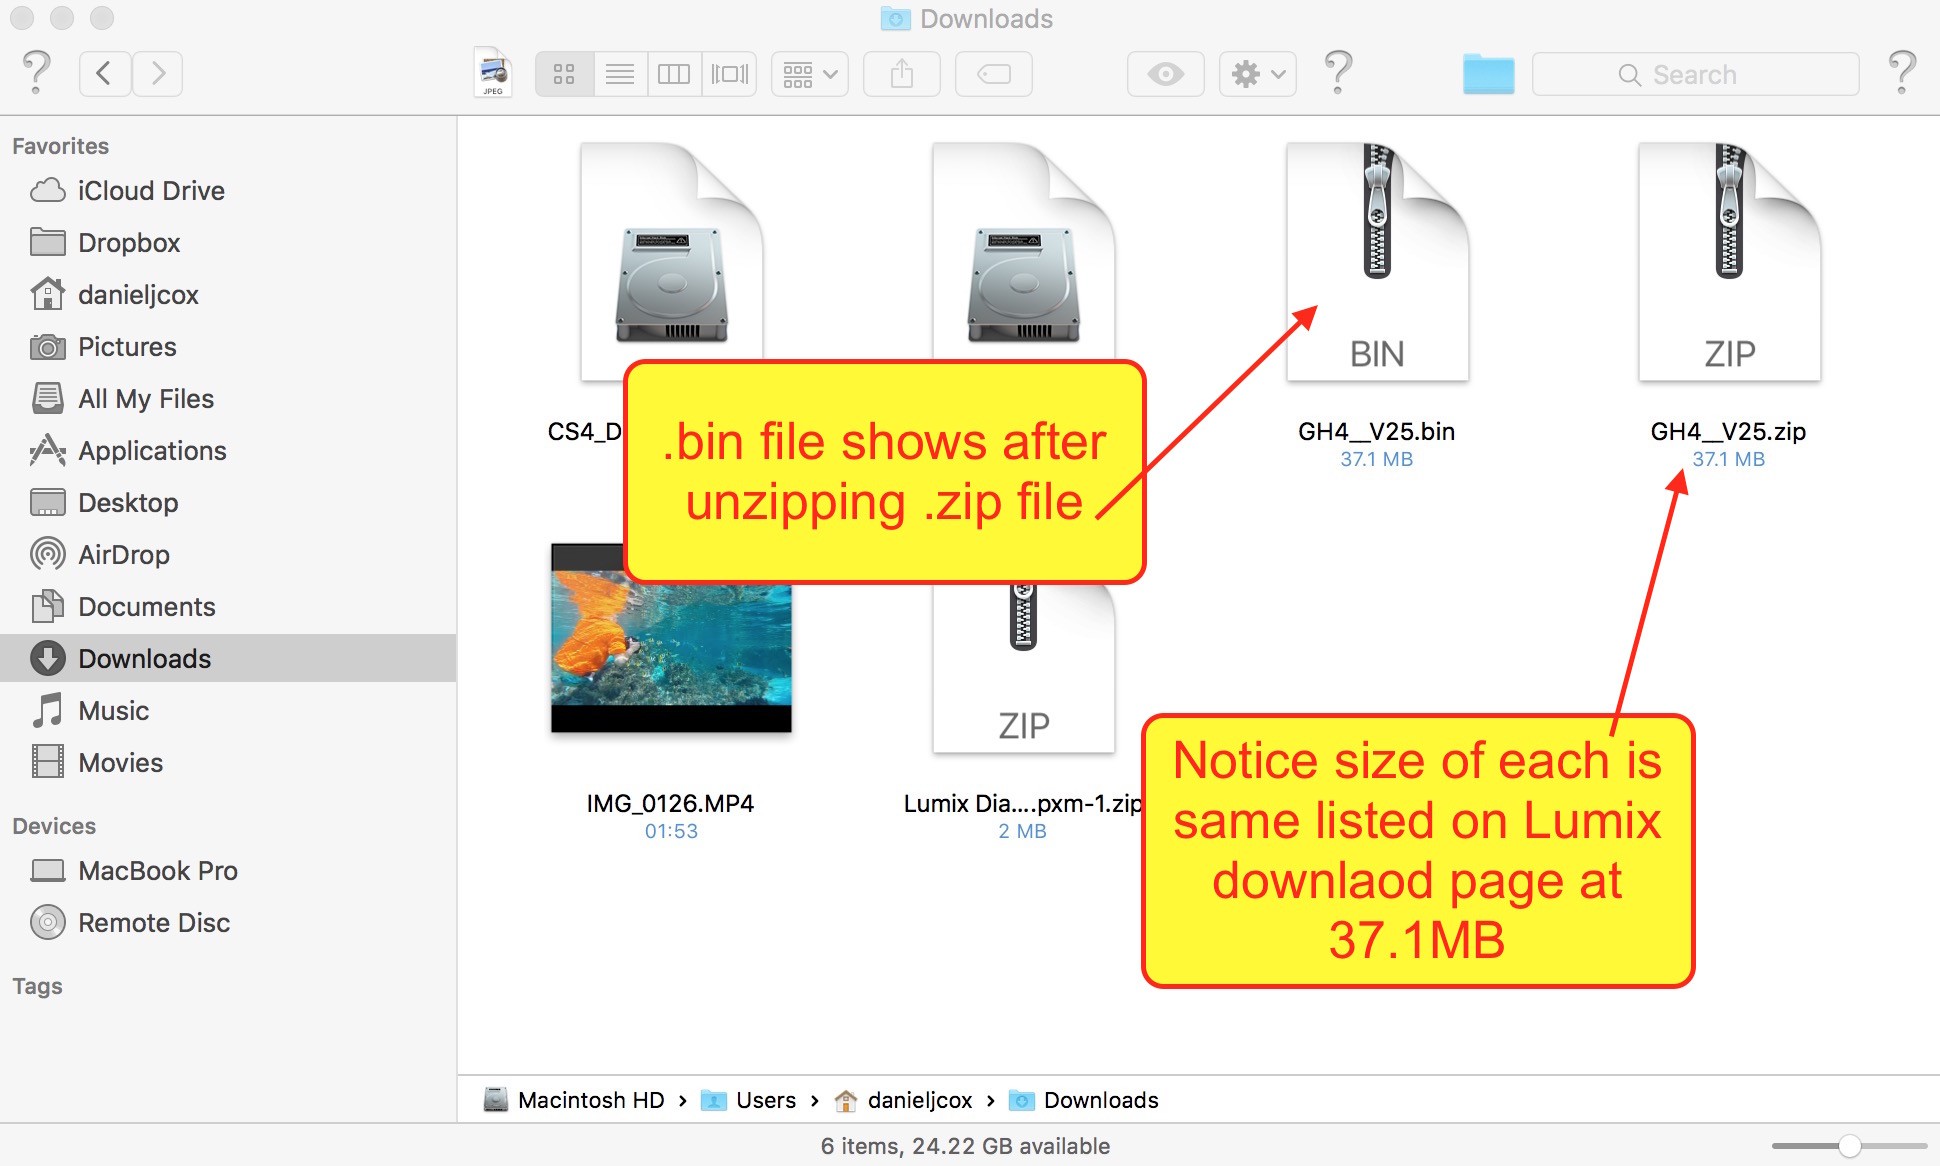
Ok, now t’s time to get this file on to you SD card. To start with, place the SD card into your SD card reader attached to your computer. If yo didn’t do the first thing I mentioned at the very top of this post, now is a good time to do it. This was the first step however so you should have this done. If not, DO IT NOW!
Next, navigate to the folder you put the file in, most likely the downloads folder and copy that file on to the SD card. Keep in mind, the file we are talking about could be either a .bin or a .lin or a .ebn file. I’m not sure why there are three different file designators, my guess is it depends on if you’re on a Mac, Windows machine, or possibly a Linux machine. But for Mac it has always been .bin when the .zip file is opened. When you download a Windows file it always comes through as a .exe file. Not sure if that file extension remains when you open the file, I can’t check since Mac won’t open .exe files, but look for .exe if you are on Windows. Once again Panasonic makes this very confusing by listing these two other files I’ve never heard of. Maybe there’s a good reason, but for me it’s always been confusing. Once either the .bin or .exe file is opened, you can copy and paste it on the SD card or just drag the file over to the SD card. Your file should now be on the card and ready to upload to your camera.Make sure this file is not placed in any of the FOLDERS on the card. Just drag the file to the open area on the card and drop it there.
Once the above is finished you will be at the end of this same page and you will see info on the next step that I’ve captured in the screenshot below. This could be much less confusing with better graphics such as photos of the specific cameras in each particular group. Same for the lenses, and almost nobody has any idea what the “Interface Unit” is. The box you want if updating a camera is “Procedure for camera body update (for camera body update with G series cameras).
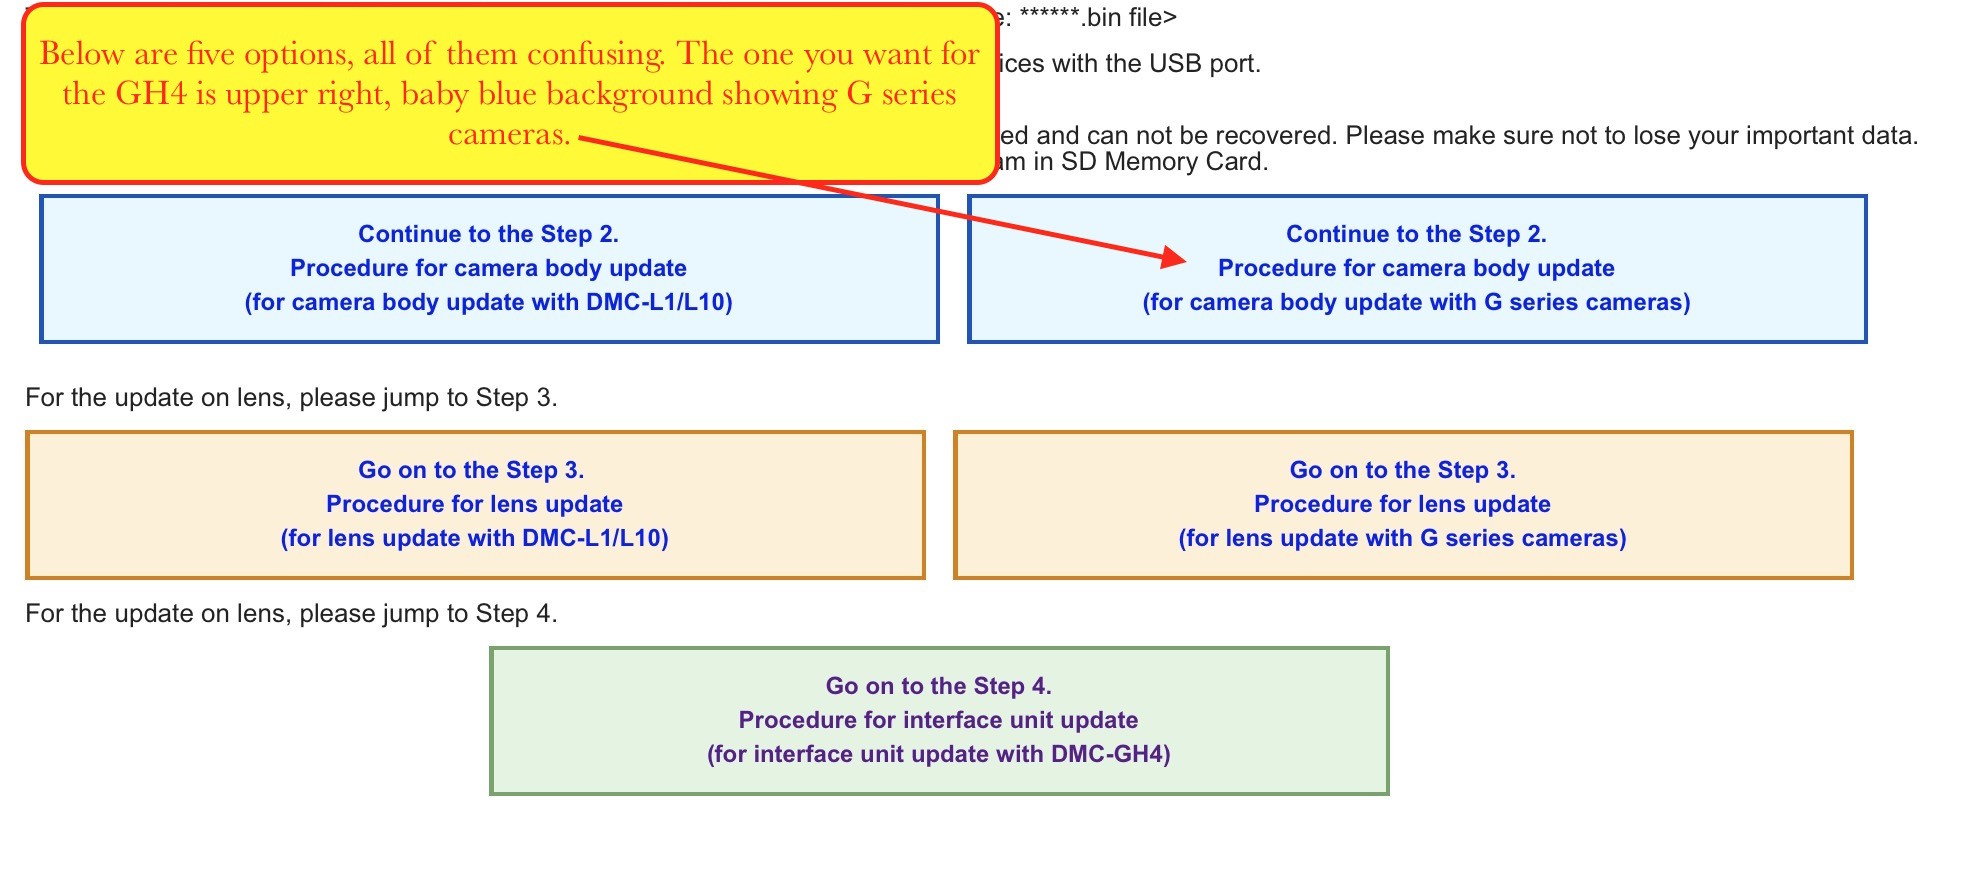
Click on that baby blue box which takes you to the next web page with very good, detailed instructions on how to actually load the file to your camera. Screenshot below. Notice the Charge the battery fully instruction. Make sure yo do this or you are dead in the water. You need a fully charged battery before anything else.
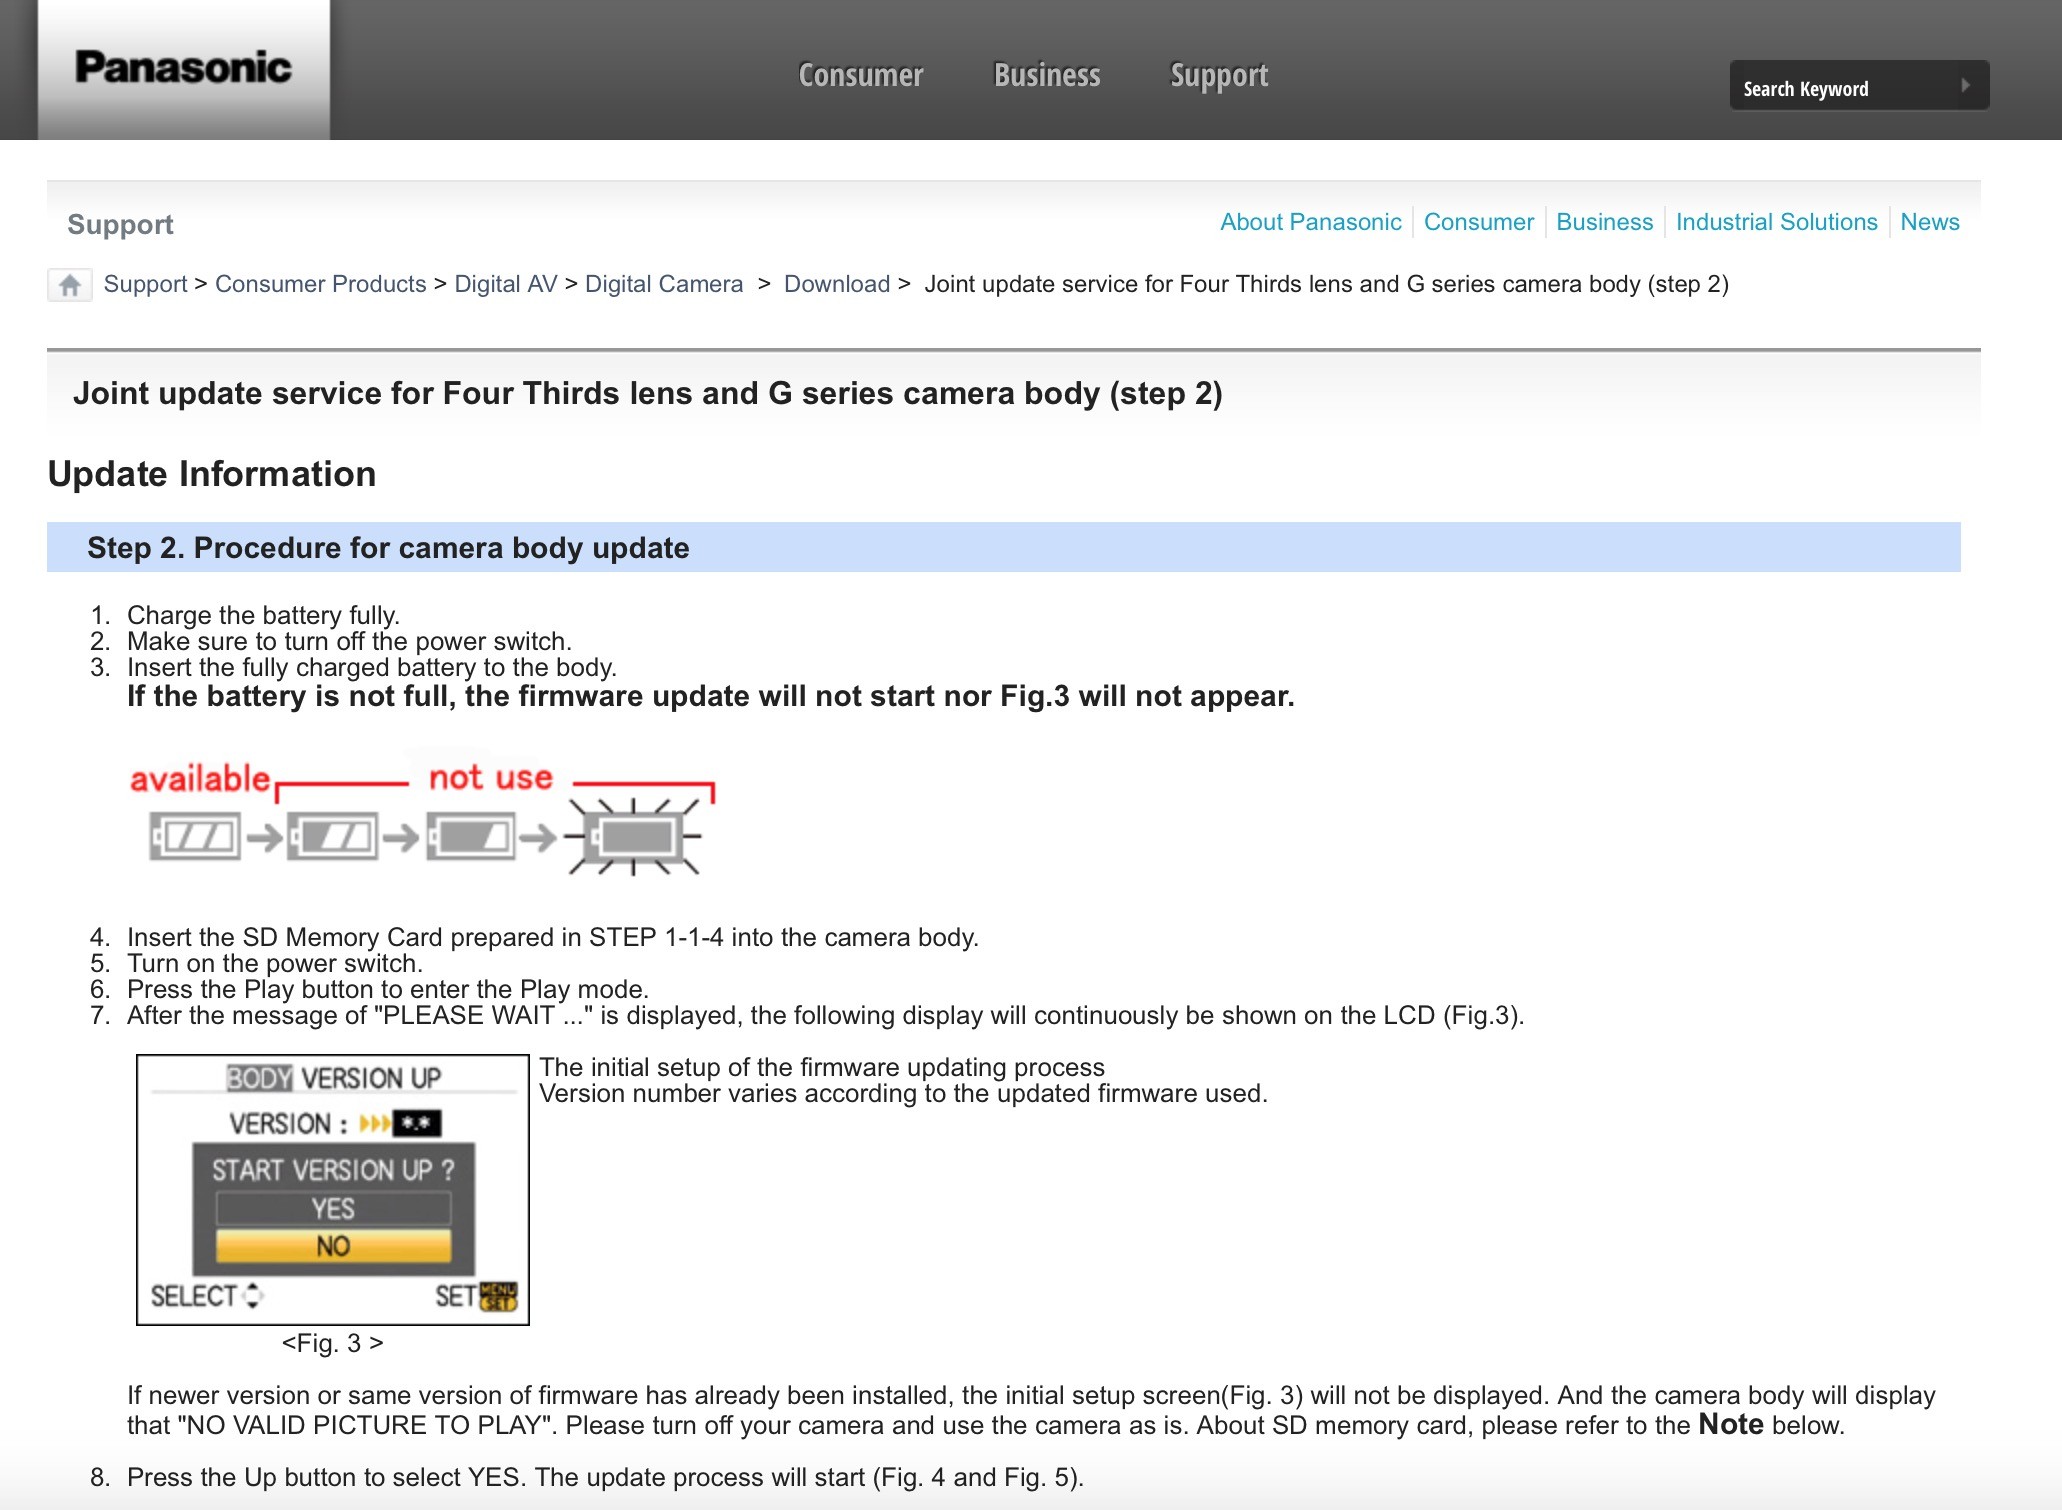 Once again, make sure you actually go to this page. The screenshot above is only part of the directions. Follow the instructions which are the least confusing of any in this entire process. Take a deep breath and read them slowly, read them carefully. Take one step at a time and all will work as it should. Unless of course you’re like a buddy of mine’s wife who he calls the Human Computer Virus. If so, then all bets are off. Just a joke to lighten the conversation 🙂
This post took a long time to write and only because this whole process is so confusing. Please add your voice about your upgrade experience to the comments below. I would love to get a large collection of people adding their opinion either god or bad. Who knows, maybe I’m stupid, and this is all as simple as flipping a switch, but for me it’s always been close to a nightmare. Maybe we can get Panasonic to make upgrades as easy to do as using their fabulous cameras.